 joyce
joyce Making restaurant-quality dim sum at home is absolutely achievable once you master three fundamentals: keeping dough moist and pliable, sealing dumplings with proper technique, and steaming at the right temperature. Most home cooks struggle with wrappers that tear, fillings that taste flat, or dumplings that stick to the steamer, but these problems come down to knowing a handful of professional tricks that experienced dim sum makers use every day.
The secret to dim sum success isn’t complicated equipment or hard-to-find ingredients. It’s understanding small but critical details: how much water belongs in your dough, why resting time matters more than you think, and the exact folding method that creates a seal strong enough to survive steaming. These techniques transform sticky, torn disasters into plump, beautiful dumplings that hold their shape and deliver the satisfying bite you’d expect from your favorite dim sum restaurant.
What makes dim sum intimidating for many Canadian home cooks is the perception that it requires years of practice or special training. The reality? Once you understand why certain steps matter, the process becomes intuitive. You’ll know when dough has the right texture by feel, when a dumpling is properly sealed with a quick visual check, and how to troubleshoot problems before they happen.
The 12 expert tips ahead come from hands-on testing in real home kitchens, addressing the specific challenges you’ll actually face. Whether you’re making siu mai, har gow, or char siu bao, these techniques will help you work faster, waste less, and produce dim sum that genuinely impresses.
How We Gathered These Expert Dim Sum Tips
We gathered these expert dim sum tips through a combination of professional consultation and rigorous home kitchen testing. Our team interviewed experienced dim sum chefs who’ve spent years perfecting their craft in restaurant kitchens, focusing on the techniques they wish home cooks knew from the start.
Every tip in this guide was then tested extensively in a standard home kitchen, not a professional setup. We used equipment most people already own and ingredients available at regular grocery stores. This real-world testing revealed which professional techniques translate well to home cooking and which ones sound good in theory but fall flat in practice.
We prioritized tips that make the biggest visible difference in your results. Some techniques might save you thirty seconds, but we focused on the ones that transform tough, chewy wrappers into delicate pockets or prevent your dumplings from bursting open mid-steam. Each technique went through multiple recipe trials, often with deliberate mistakes to confirm what happens when you skip a step.
The result is a collection of tested, reliable advice that addresses the actual challenges home cooks face when making dim sum. These aren’t just theoretical best practices but proven methods that work in kitchens like yours.
1. Start with Room Temperature Dough for Easier Wrapper Handling
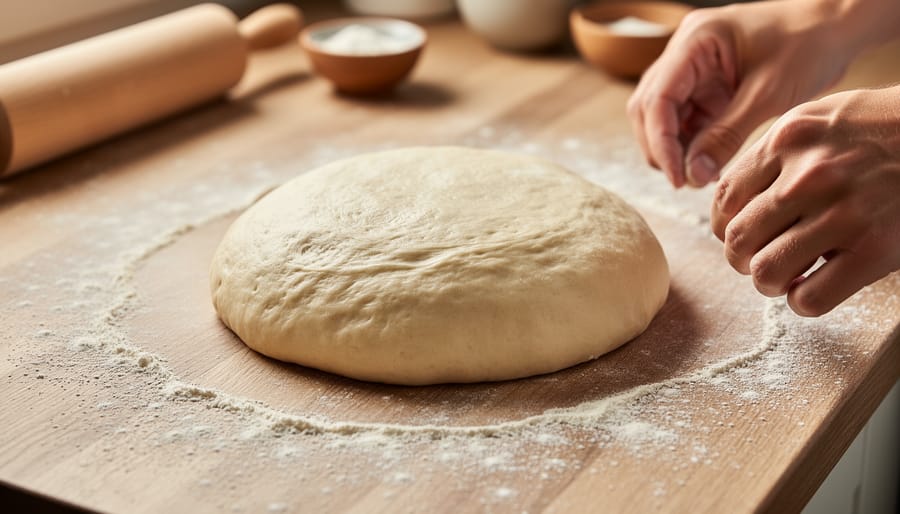
Cold dough straight from the fridge fights back when you try to roll it thin. The gluten strands are tight and rigid, making the dough snap back like a rubber band. Worse, cold dough lacks the flexibility needed for delicate wrappers, so it cracks at the edges and tears when you try to stretch it around filling.
Letting your dough sit at room temperature for 30 minutes solves this completely. The warmth relaxes the gluten network, making the dough supple and cooperative. You’ll notice the difference immediately when you start rolling: the dough stretches smoothly instead of resisting, and you can achieve the paper-thin translucency that makes homemade dim sum special.
This resting period also lets the flour fully hydrate, which creates a more elastic texture. Your wrappers become pliable enough to pleat without tearing, yet strong enough to hold their shape during steaming.
One crucial detail: cover the dough with a damp towel or plastic wrap while it rests. Exposed dough forms a dry skin within minutes, and those dried spots will never roll out properly. They create weak points that split open when you fold your dumplings.
This single step, taking zero effort beyond patience, prevents more wrapper failures than any other technique. Start here, and you’re already ahead of most home cooks.
2. Use the Pinch-and-Pleat Method for Professional-Looking Pleats
The pinch-and-pleat method is what gives restaurant dim sum that distinctive crescent shape with all those beautiful folds running along the top. Professional dim sum chefs use this technique because it’s not just about looks. Those pleats actually create a double layer of dough along the seal, which means your dumplings won’t burst open during steaming.
Here’s how it works: hold the filled wrapper in your non-dominant hand with the filling centered. Use your dominant hand’s thumb and index finger to pinch the wrapper at one edge, then use your other thumb to push a small fold toward the pinch point. Press to seal, then move about a quarter-inch along the edge and repeat. You’re creating all 12 to 18 pleats on one side only while the other side stays smooth and unpleated.
The key is working from one end to the other in the same direction, keeping each pleat roughly the same size. Your first few dumplings might look a bit wonky, and that’s completely normal. Most home cooks find that by their tenth or twelfth dumpling, their hands start remembering the motion. By the time you’ve made a full batch, you’ll notice a real difference.
If perfect pleats feel overwhelming at first, aim for just 8 to 10 larger folds. The dumpling will still seal properly and taste delicious. You can work up to more intricate pleating as your confidence grows.
3. Keep Filling Portions Consistent with a Small Scoop
One of the most underrated tools in dim sum making is a small cookie scoop or melon baller. Professional dim sum chefs portion their fillings with remarkable consistency, and you can too by using a simple 1-tablespoon scoop.
Consistent portions solve several problems at once. When every dumpling contains the same amount of filling, they all cook at the same rate. No more worrying about some being undercooked while others are perfect. You’ll also avoid the common beginner mistake of overstuffing, which puts too much pressure on the wrapper and causes bursting during steaming.
Beyond the practical benefits, using a scoop trains your hands. After making a few dozen dumplings with measured portions, you’ll develop an instinctive feel for the right amount. Eventually, you won’t need the scoop at all, your fingers will know exactly how much filling to grab.
Start with a level tablespoon for most dumpling sizes. You can always adjust slightly based on your wrapper size, but having that baseline keeps everything predictable. This small investment in consistency pays off with better-looking, better-cooked dumplings every single time.
4. Master the Moisture Balance in Your Filling
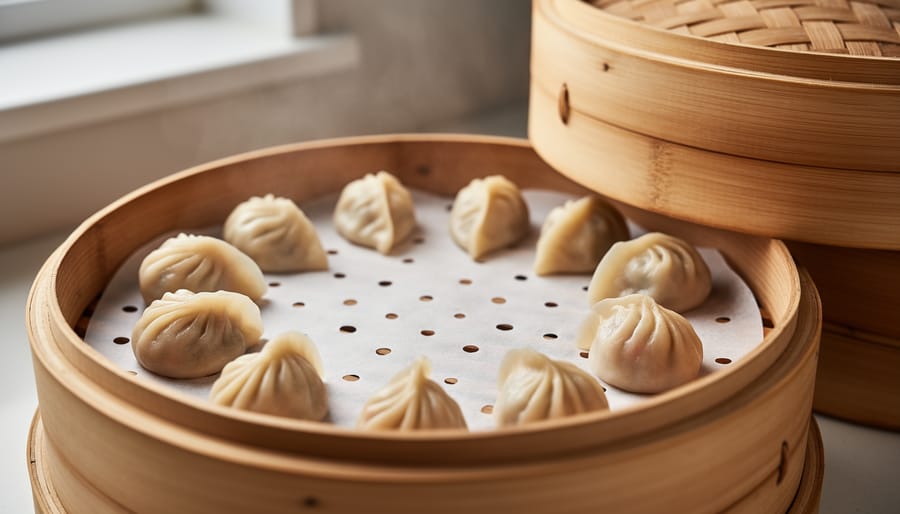
Getting the moisture level right in your filling is probably the trickiest part of making dim sum at home, but it’s also what separates restaurant-quality dumplings from disappointing ones. Too much liquid and your wrappers turn soggy and tear during steaming. Too little and you end up with a dry, pasty filling that feels heavy instead of juicy.
The secret weapon professional dim sum chefs rely on is cornstarch or tapioca starch, which acts like a sponge to absorb excess moisture while keeping fillings tender. Add about one tablespoon of starch per pound of filling as a starting point. The starch captures liquid released during cooking and transforms it into a silky coating that makes each bite feel moist without being wet. Tapioca starch gives a slightly bouncier texture, while cornstarch creates a softer feel.
How you prepare your vegetables matters just as much as adding starch. Finely minced vegetables release moisture gradually and distribute evenly throughout the filling. Large chunks create pockets of water that pool and soak through wrappers. If you’re using ingredients like napa cabbage or zucchini, salt them lightly and let them sit for 10 minutes, then squeeze out the excess water before mixing into your filling.
Before you commit to wrapping 30 dumplings, make one test dumpling with your filling and steam it. This five-minute check tells you everything you need to know. When you cut it open, the filling should look cohesive and moist with just a hint of glossy coating from the starch, not sitting in a puddle of liquid. The wrapper should be intact and slightly translucent, not waterlogged or torn. If your test dumpling fails, you can adjust the remaining filling before you’ve wasted time and ingredients.
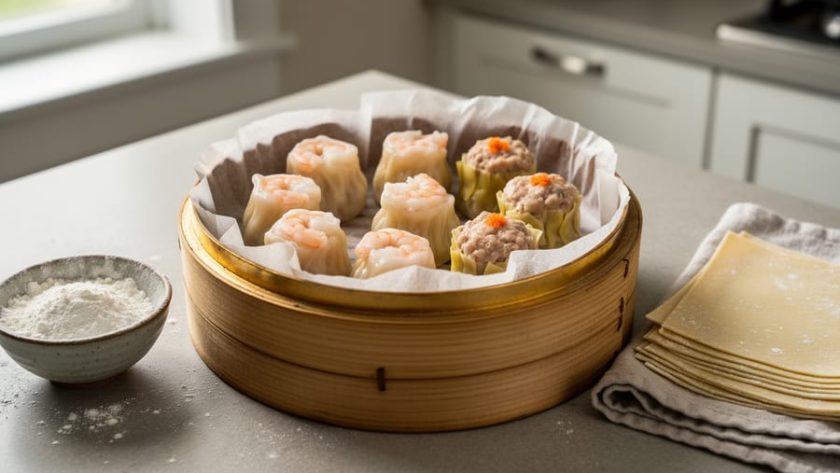
5. Line Your Steamer Properly to Prevent Sticking
Nothing ruins a batch of beautifully pleated dumplings faster than watching them tear apart when you try to remove them from the steamer. Direct contact between dumpling wrappers and steamer surfaces creates a sticky mess, but proper lining prevents this completely.
The most accessible solution is parchment paper with holes punched through it. Cut circles to fit your steamer basket, then use scissors to punch 8-10 small holes for steam circulation. This allows heat to reach the dumplings while creating a non-stick barrier. You can buy pre-cut perforated steamer liners, but making your own works just as well and costs pennies.
Cabbage or lettuce leaves offer a traditional, zero-waste alternative. Choose large, flexible leaves and tear out thick ribs that might create uneven surfaces. The leaves add subtle flavor and peel away cleanly after steaming. Many dim sum restaurants use this method for certain dumplings, particularly siu mai.
Reusable perforated silicone mats fit most steamer sizes and last for years. They release dumplings effortlessly and go straight into the dishwasher.
For bamboo steamers specifically, you can skip liners by lightly brushing the bamboo slats with neutral oil before each use. This restaurant technique works but requires reapplication for every batch, making liners more practical for home cooks steaming multiple rounds.
6. Give Dumplings Space in the Steamer
One of the most common mistakes home cooks make is cramming too many dumplings into the steamer at once. Give each dumpling about 1 inch of breathing room on all sides. As dumplings steam, the wrappers soften and expand slightly, and if they’re touching, they’ll fuse together into one awkward clump that tears when you try to separate them.
Beyond preventing sticking, proper spacing ensures even heat distribution. When dumplings crowd each other, they block steam from circulating freely, which means the ones in the center take longer to cook while the outer ones might overcook. You’ll end up with some perfectly steamed dumplings and others that are gummy or undercooked.
Yes, steaming in batches takes a bit more time, but it’s worth it. Most home steamers can comfortably hold 6-8 dumplings depending on size. If you’re making a large batch for a gathering, consider using two stacked steamer baskets or multiple setups. The results will be consistently better than trying to squeeze everything in at once.
7. Use High, Consistent Steam for Translucent Wrappers
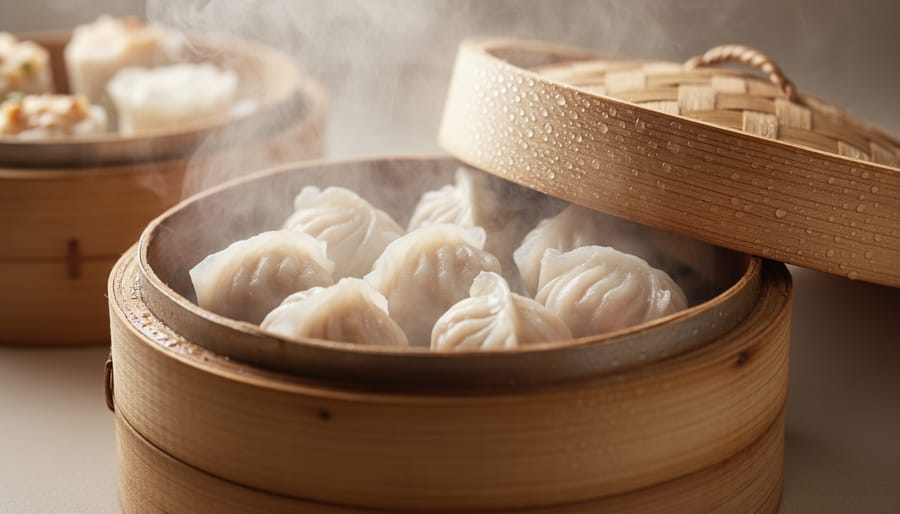
The single most important factor for achieving those gorgeously translucent wrappers you see at dim sum restaurants is maintaining a strong, steady flow of steam from start to finish. Your water should be at a full, rolling boil before the steamer goes on, and it needs to stay that way the entire time.
Here’s what actually happens when steam temperature drops: the starch in the wrapper doesn’t set properly, creating a gummy, sticky texture instead of that delicate, slightly chewy bite. The wrapper also loses its translucency and can turn an unappetizing opaque grey. Professional dim sum kitchens keep their steamers over commercial burners that maintain consistent high heat, which is why their dumplings look so much better.
Preheat your steamer for at least 3 minutes before adding dumplings. This ensures the cooking environment is hot enough from the moment they go in. Once you close the lid, resist the urge to peek. Every time you lift the lid, you release a blast of steam and drop the temperature inside, adding time and potentially creating uneven texture.
Most dumplings need 8 to 12 minutes of high, consistent steam. Smaller har gow or siu mai sit at the shorter end, while larger buns need the full time. If your burner struggles to maintain a boil with the steamer on top, use your highest heat setting or consider steaming in smaller batches.
8. Freeze Uncooked Dumplings on a Tray First
One of the best-kept secrets from dim sum restaurants is their freezing method, which lets you prepare massive batches without ending up with a frozen clump of dumplings fused together. The key is flash-freezing on a tray before any long-term storage.
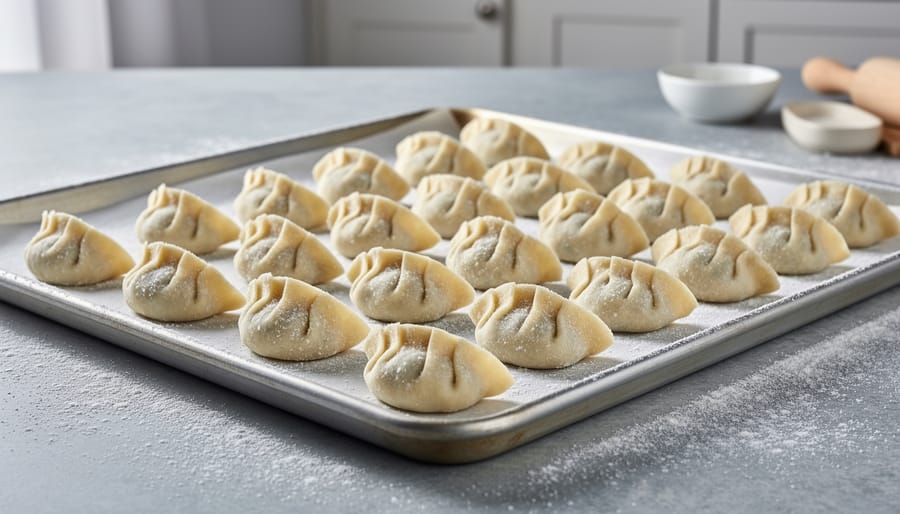
Arrange your freshly assembled dumplings on a parchment-lined baking sheet, making sure they don’t touch each other. Pop the whole tray into your freezer for 2-3 hours until the dumplings are completely solid. This initial freeze sets the shape and creates a protective barrier on the wrapper’s surface. Once frozen hard, you can transfer them to freezer bags or containers where they’ll stay separate and ready to grab individually.
This method transforms dim sum from a day-long project into something you can pull off on a weeknight. Make 50 dumplings on a lazy Sunday, freeze them properly, and you’ve got quick meals for weeks. When you’re ready to cook, there’s no need to thaw. Steam them straight from the freezer, just add 2-3 extra minutes to your usual steaming time.
- Use parchment paper on the tray to prevent any sticking during the initial freeze
- Label your freezer bags with the dumpling type and date (they keep well for up to 3 months)
- Don’t stack dumplings until they’re completely frozen solid
- Add an extra minute or two if steaming a full batch from frozen rather than just a few pieces
Professional dim sum kitchens rely on this exact technique to maintain their pace during service. Your home freezer gives you the same advantage, turning an intimidating cooking project into a practical meal prep strategy that actually fits into real life.
9. Mix Filling in One Direction for Better Texture
One of the most overlooked techniques in dim sum making is the way you mix your meat filling. Professional dim sum chefs always stir their filling in one consistent direction, either clockwise or counterclockwise, rather than switching directions randomly. This isn’t superstition; it’s food science at work.
When you mix ground pork or shrimp in a single direction, you align the protein strands and encourage them to bind together into a cohesive network. This creates the characteristic bouncy, springy texture that defines quality dim sum. The filling holds together beautifully when you bite into it, rather than crumbling apart.
The moment you reverse direction or stir haphazardly, you break down those protein bonds you’ve just built. The result is a loose, mealy filling that lacks structure.
Use chopsticks or your hand to stir vigorously in your chosen direction for at least two minutes. You’ll notice the filling becomes sticky and starts to pull away from the bowl in one mass. That’s exactly what you want. This simple directional consistency makes an enormous difference in the final texture of your dumplings.
10. Add a Touch of Sugar to Balance Savory Fillings
Adding a small amount of sugar to your savory dim sum filling might seem counterintuitive, but it’s a foundational technique in Chinese cooking that professional chefs swear by. Use just 1-2 teaspoons per pound of meat or seafood filling, not enough to make it taste sweet, but sufficient to enhance and round out all the other flavors.
This works because sugar acts as a flavor amplifier, bringing forward the umami notes from ingredients like soy sauce, oyster sauce, and shiitake mushrooms. In Chinese culinary tradition, balancing the five tastes (sweet, salty, sour, bitter, umami) creates more complex, satisfying dishes than relying on a single dominant flavor.
When you mix sugar into your pork or shrimp filling along with the soy sauce and sesame oil, it brightens everything without crossing into sweetness. The filling tastes richer and more dimensional rather than one-note salty. Think of it like adding a pinch of salt to chocolate chip cookies, it’s there to enhance, not to be tasted directly.
Start conservatively with 1 teaspoon per pound if you’re skeptical. You can always adjust upward in your next batch once you notice how it deepens the savory profile.
11. Test Your Wrapper Dough Thickness with Light
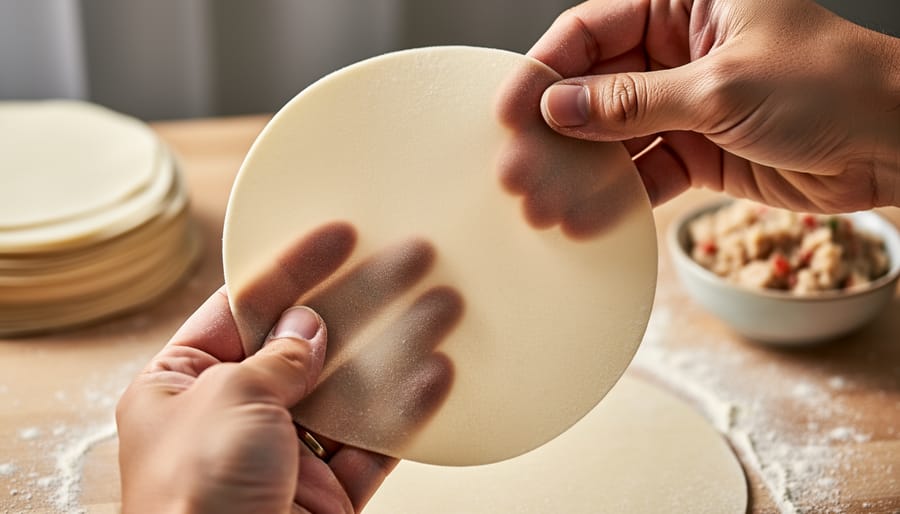
Professional dim sum chefs use a surprisingly simple trick to check wrapper thickness: they hold the rolled dough up to a light source. This visual test reveals exactly what your diners will experience, since light shows where the wrapper is too thick (opaque spots that will turn out chewy and tough) or dangerously thin (completely transparent areas that will tear during folding or steaming).
The sweet spot you’re aiming for is a wrapper thin enough that you can see the outline of your fingers through it when you hold it between yourself and a window or lamp, but not so thin that it looks like tissue paper. Think of it as translucent rather than transparent. Your fingers should appear as shadowy shapes, not crystal-clear images.
This technique is particularly helpful when you’re learning to roll, because it trains your eye to recognize the right thickness before you’ve built up muscle memory. Roll a wrapper, check it against the light, and adjust your pressure accordingly. Uneven thickness is actually more problematic than slightly-too-thick wrappers overall, because those thin spots become weak points that burst open when the filling expands during steaming. Check each wrapper as you work until you develop a consistent rolling rhythm.
12. Rest Assembled Dumplings Before Cooking
Once you’ve assembled your dumplings, resist the urge to steam them immediately. Professional dim sum chefs swear by a 10-15 minute resting period, and this simple waiting game can be the difference between dumplings that hold together beautifully and ones that spring leaks during cooking.
During this rest time, moisture from the filling gently hydrates the wrapper edges where you’ve sealed them. This creates a much stronger bond than a freshly pinched seal, making the dumpling less likely to open up when it hits the steam. The wrapper essentially “glues” itself to the filling through this moisture transfer.
The rest period also allows the gluten in your wrapper dough to relax after all the stretching and folding you’ve done. This results in a more tender, delicate texture rather than a tight, chewy wrapper that fights back.
Place your assembled dumplings on a lightly floured or parchment-lined tray while they rest, making sure they don’t touch each other. Cover them loosely with a damp kitchen towel to prevent the exposed wrapper from drying out and cracking. This brief patience pays off with dumplings that look and taste restaurant-quality.
Common Dim Sum Questions Answered
Can I use store-bought wrappers instead of making my own?
Absolutely. Look for round dumpling wrappers labeled “gyoza” or “dumpling wrappers” in the refrigerated section of Asian grocery stores. The thinner varieties (usually white or translucent packages) work best for steaming, while thicker ones are better for pan-frying.
What if I don’t have a bamboo steamer?
A metal steamer basket works perfectly fine, or you can improvise by placing a heatproof plate on a wire rack inside a large pot with a lid. Just make sure there’s about an inch of water below the plate and that steam can circulate around the dumplings.
How do I know when my dim sum is fully cooked?
The wrappers should look translucent and slightly glossy rather than chalky or opaque. For meat-filled dumplings, the filling should feel firm when you gently press the top, and you’ll see no raw dough color peeking through anywhere. Most dumplings take 8-10 minutes of vigorous steaming.
Can I make dim sum ahead for a party?
Yes, and it actually makes entertaining much easier. Assemble your dumplings up to 24 hours ahead, arrange them on parchment-lined trays, cover tightly with plastic wrap, and refrigerate. You can also freeze them for up to three months using the flash-freeze method mentioned earlier.
These answers cover the hurdles that stop most people from attempting dim sum at home. The wrapper question matters because making dough from scratch intimidates beginners, but quality store-bought options deliver excellent results. You’ll find that experimenting with different brands helps you discover your preferred thickness and texture.
The steamer alternatives open up dim sum making to anyone with basic kitchen equipment. Plenty of home cooks have made beautiful dumplings using nothing more than a plate balanced on jar rings inside a stockpot. It’s not about fancy gear, it’s about steam circulation and steady heat.
How We Chose This List
We selected these 12 expert tips based on four key criteria that ensure they deliver genuine value to home cooks attempting dim sum for the first time or looking to improve their technique.
First, each tip had to address a common pain point we observed during extensive recipe testing in our own kitchen. Techniques that solved frequently-asked reader questions, like why wrappers tear or dumplings stick, took priority over obscure professional tricks that rarely matter at home.
Second, we verified every technique through multiple rounds of hands-on testing. Any tip that didn’t produce consistently better results compared to standard methods was cut, regardless of how traditional or expert-endorsed it seemed.
Third, we prioritized accessibility. Tips requiring specialty equipment beyond a basic steamer or hard-to-find ingredients didn’t make the list. The goal was actionable advice that works with what most Canadian home cooks already have.
Finally, we organized tips in an order that builds foundational skills first, dough handling and shaping, before moving to refinements like moisture balance and flavor adjustments. This progression helps beginners start successfully while giving experienced cooks advanced techniques to polish their craft.
Mastering dim sum at home takes practice, but you’ve now got the insider techniques that professional chefs rely on every day. These 12 expert tips eliminate the guesswork and help you avoid the common frustrations that discourage many home cooks from even trying.
Start small. Pick one or two dumpling styles that appeal to you and focus on perfecting those first. Maybe it’s classic pork and shrimp siu mai or vegetable-filled har gow. As these techniques become second nature, the pinch-and-pleat method, the proper steaming setup, the moisture balance in your filling, you’ll find yourself ready to tackle more ambitious dim sum varieties.
Your first batch might not look restaurant-perfect, and that’s completely normal. Each time you fold a dumpling, you’re building the muscle memory that makes the next one easier. The beauty of dim sum is that even imperfectly shaped dumplings taste delicious when you’ve nailed the fundamentals.
We’d love to hear about your dim sum adventures. Which tip made the biggest difference in your results? Are you running into any challenges we didn’t cover? Share your experiences in the comments below. Your questions and successes help other home cooks on the same journey, and we’re here to troubleshoot alongside you.